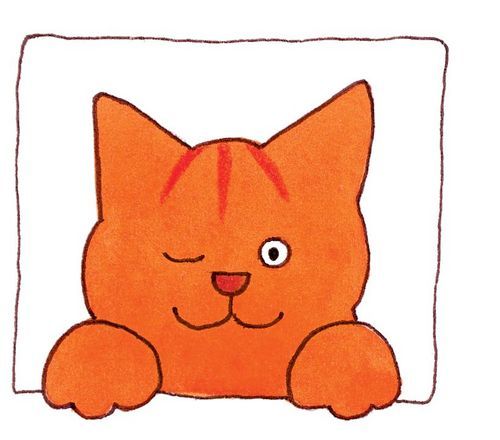
My youngest cousins are big fans of a children’s (picture)book series called ‘Dikkie Dik’. It’s about a cat who has all kinds of adventures with his friends. I used to love it as a kid as well, so it’s nice to see that it’s a timeless series.
Anyway! I decided to try my hand at a pattern for the main character, so without further ado, here it is!


Supplies
- Drops Paris – Orange (13)
- Katia Capri – Orange/red (164)
- Katia Capri – Black (56)
- G hook 4,0 mm
- Yarn needle
- Polyester stuffing
- Either 6 mm or 4 mm* eyes
- *If using 4 mm eyes: white felt
Body
Start with a magic ring.
- 6 sc in mr (6)
- 2 sc in every sc (12)
- *1 sc, inc* (18)
- *2 sc, inc* (24)
- *3 sc, inc* (30)
- *4sc, inc* (36)
- *5sc, inc* (42)
8-22. sc around (42)
23. *5 sc, dec* (36)
24. sc around (36)
25. dec 5, sc around (31)
26. inc 5, sc around (36)
27. sc 4, dec around (30)
28-32. sc around (30)
33. dec 8, sc 20, dec 1 (21)
34. sc around (21)
35. sc 8, dec 6, sc 1 (14)
Add eyes between rw 32-33
36. dec, sc5, dec3 (9)
37. dec, sc 2, dec 4 (4)
Sl st, fasten off. Pull end of yarn through body to hide end.
Embroider nose with red/orange Katia Capri
Embroider mouth with black Katia Capri
Feet (4)
Start with magic ring.
- 6 sc in mr (6)
- 2 sc in every st (12)
- *sc, inc* (18)
4-6. sc around (18)
7. dec 6, sc around (12)
8-9. sc around (12)
Sl st, fasten off. Leave long tail for attaching.
Tail
Start with magic ring.
- 3 sc in mr (3)
- 2 sc in every sc (6)
3-5. sc around (6)
6. *sc, inc* (9)
7-12. sc around
sl st, fasten off, leave long tail for attaching.
Ears (2)
Start with magic ring.
- 6 sc in mr (6)
- 2 sc in every st (12)
3-5. sc around(12)
Assembling
I attached the hind feet between row 6 and 10 of the body.
The front feet go between row 21 and 24 of the body.
The ears I attached between row 28 and 30.
The tail goes between row 7 and 10.
These are only suggestions.
When done assembling, embroider the stripes on the body about 3 rows apart. Dikkie Dik has 5 stripes on his body. On his head, he has 3 stripes from the back of his head in the direction of his face, going between the eyes. I placed them with about two stitches in between each stripe. (See pictures.)
Congratulations! You’ve made your own Dikkie Dik!
If there is anyone who knows the Dutch terms well enough to translate the pattern into Dutch, I’d be glad to hear it!